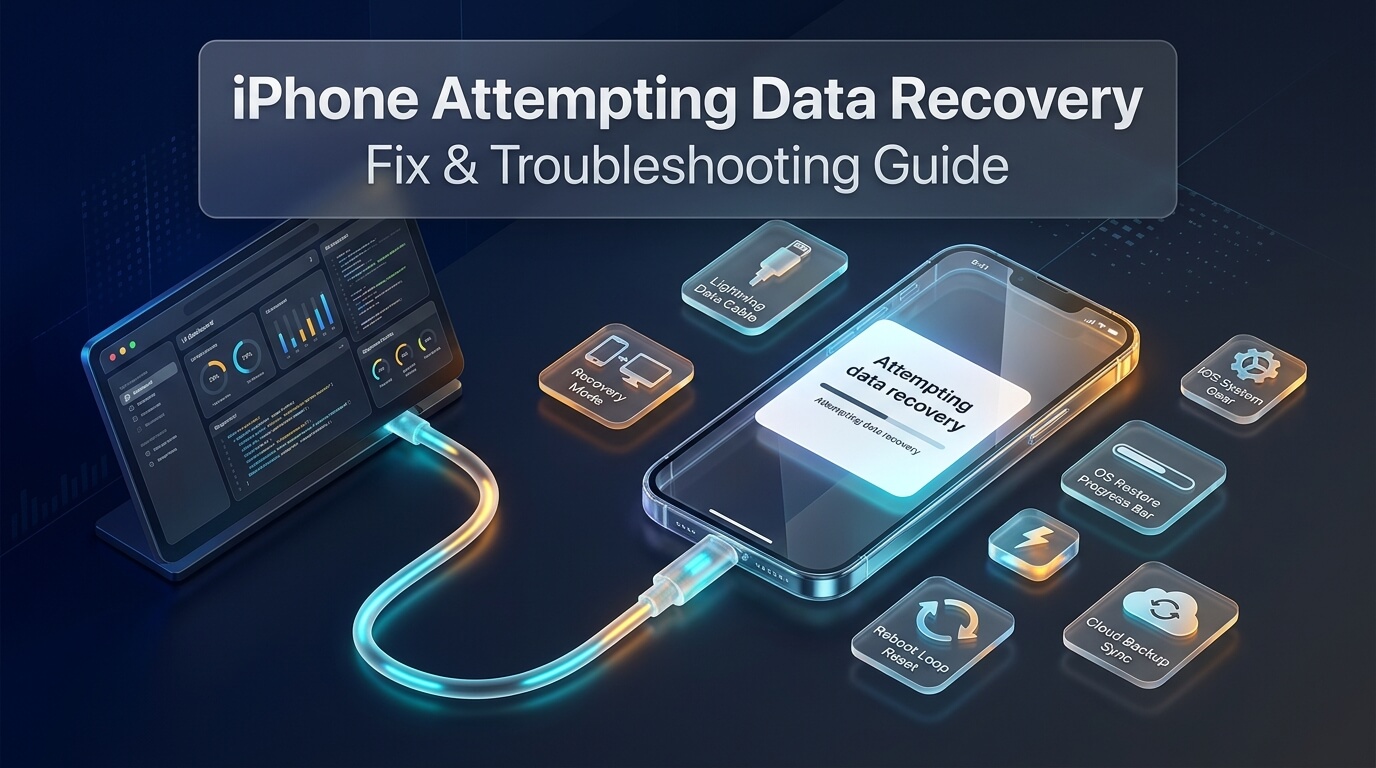
Few smartphone alerts cause more immediate anxiety than seeing a stark white or black screen reading attempting data recovery on your Apple device. This unexpected prompt often appears right after updating iOS via iTunes, Finder, or over-the-air settings. When the progress bar stalls for hours, many users fear their personal photos, messages, and contacts have vanished forever.
Experiencing an attempting data recovery iphone freeze is a relatively common occurrence across recent iOS releases. In most situations, your device is not permanently bricked, and your files are not gone. Understanding how iOS migrates user databases helps demystify this process and guides you toward safe troubleshooting.
Whether you find your iphone stuck on attempting data recovery after an interrupted software installation, face a dreaded iphone attempting data recovery loop, or encounter an error stating that data recovery cannot be completed, practical fixes exist. In this guide, we explain the technical causes behind this prompt, walk through non-destructive recovery methods, review top iOS repair platforms, and provide preventative backup habits.
Key Takeaways on iPhone Data Recovery Screens
- The attempting data recovery prompt is Apple native automated procedure to salvage and re-index user databases following an update glitch.
- Never disconnect your charging cable while the progress bar moves; database indexing can take over an hour on high-capacity devices.
- If your iphone says attempting data recovery and reboots endlessly, performing a hard force restart often breaks the loop.
- Using Recovery Mode via Apple Finder or iTunes lets you reinstall clean iOS firmware while keeping your personal media untouched.
- When receiving a message that data recovery cannot be completed iphone users can restore recent iCloud or local desktop backups.
- Similar glitches happen on Apple tablets; troubleshooting an ipad attempting data recovery follows identical hardware force-restart rules.
- Dedicated third-party iOS repair tools offer Standard Repair options that fix boot loops without formatting your internal storage.
What Does “Attempting Data Recovery” Actually Mean?
When users encounter this unfamiliar screen, their immediate question is what does attempting data recovery mean on iOS? Looking into the iphone attempting data recovery meaning reveals an automated safety protocol engineered directly into Apple APFS (Apple File System) architecture.
During a major iOS software upgrade, the installer does not merely replace core system files. It must also migrate complex user databases, including SQLite photo indexes, encrypted Keychain passwords, HealthKit records, and Message caches. If this migration hits an unexpected error, iOS pauses normal booting.
Rather than wiping your storage or displaying a permanent kernel panic, the operating system initiates this automated salvage routine. It scans unallocated sectors, repairs damaged file allocation pointers, and attempts to re-index fragmented databases. When your iphone attempting data recovery screen appears, iOS is actively trying to protect your data from permanent corruption.
APFS Architecture and SQLite Database Migration
To understand why this salvage process occurs, examining Apple File System (APFS) architecture provides valuable technical insight. Modern iPhones format internal flash memory using APFS containers that dynamically share storage space between the system volume and user data volume.
iOS applications store nearly all personal user data inside specialized SQLite databases. When you update across iOS generations, the database schema frequently changes. For example, Apple Photos creates new face recognition neural embeddings, while Messages updates thread encryption tables. To update these files without corrupting them, iOS utilizes Write-Ahead Logging (WAL) and database checkpointing.
If the iPhone runs out of temporary scratch space during checkpointing, the SQLite database becomes temporarily inconsistent. The operating system cannot safely mount the user data volume. The recovery screen represents Apple automated fsck (file system consistency check) utility replaying the write-ahead logs to restore database integrity before proceeding with startup.
Why Is My iPhone Attempting Data Recovery? Root Causes
Understanding why is my iphone attempting data recovery helps identify the specific trigger behind the crash. Several software and hardware conditions cause the Apple update engine to enter this salvage state.
Here are the primary causes behind the recovery prompt:
- Critically Low Internal Storage: Installing a modern iOS update requires significant temporary scratch disk space. If your iPhone had less than five gigabytes of free storage before starting, the installer runs out of space while expanding firmware archives.
- Interrupted Firmware Installation: Unplugging your Lightning or USB-C cable during an iTunes sync, or experiencing a sudden battery drain during an over-the-air update, corrupts partial firmware files.
- Downgrading from iOS Beta Releases: Reverting from an iOS developer or public beta back to a stable public build frequently triggers database incompatibilities, forcing the OS to reconstruct SQLite tables.
- Corrupted Local Backup Files: Restoring from an outdated or damaged computer backup can cause permission mismatches across the internal storage directory.
- Hardware Aging and Logic Board Wear: Deteriorating NAND flash memory blocks or failing power management chips can trigger write errors during high-stress firmware updates.
Hardware Trauma vs. Firmware Glitches: Spotting Failing NAND
While software migration issues account for most recovery screens, physical hardware deterioration can trigger identical symptoms. Discerning whether your issue stems from firmware corruption or physical board failure prevents wasted troubleshooting hours.
If your iPhone suffered a hard drop onto concrete or was exposed to liquid shortly before updating, the mechanical shock can crack microscopic solder balls beneath the NAND flash memory chip or baseband processor. When the iOS installer writes gigabytes of uncompressed firmware data, the elevated processor heat causes thermal expansion. This expansion temporarily severs connection between the logic board and memory controller.
When this happens, computer updates fail repeatedly with specific numeric error codes in Finder or iTunes, such as Error 4013, Error 9, or Error 14. If repeated computer restores fail at the exact same twenty percent progress mark, the underlying issue is likely physical hardware damage requiring board-level micro-soldering rather than software repair.
The Dreaded Recovery Loop: Why Devices Get Stuck
While this recovery process normally concludes within fifteen to thirty minutes, problems arise when an attempting data recovery iphone loop develops. In this scenario, the progress bar reaches the end, the phone reboots, and the exact same recovery screen displays again.
A persistent loop happens when iOS encounters a damaged system file that its native repair script cannot fix automatically. The system repeatedly retries the repair routine without progressing. In severe instances, the screen switches to an alert stating that data recovery failed iphone systems cannot proceed, prompting you to press the Home button or swipe up to recover.
Tablet users experience this exact same headache. An ipad stuck on attempting data recovery displays identical behavior when updating iPadOS with insufficient storage. Seeing a warning that data recovery failed ipad models simply means the tablet requires manual firmware recovery via computer connection.
Immediate Action Blueprint: What to Do First
Before rushing into aggressive troubleshooting, follow this disciplined preliminary blueprint to prevent accidental data loss.
Follow these three crucial preliminary checks:
1. Wait Patiently for at Least One Hour
Do not panic immediately. If you own a 256GB, 512GB, or 1TB iPhone filled with thousands of photos and videos, rebuilding file indexes takes substantial time. Many users assume their device is frozen when it is simply processing massive media libraries. Keep the phone plugged into power and allow it at least sixty to ninety minutes to complete.
2. Connect to an Authentic Apple Wall Charger
Ensure your device is connected to a high-output wall adapter rather than a low-power computer USB port. Insufficient voltage during database indexing can cause the device to throttle or restart prematurely.
3. Check for Incremental Progress Bar Movement
Take a photo of the progress bar using a second phone or note its alignment relative to the Apple logo text. Return fifteen minutes later to see if the bar has advanced even one millimeter. If it is creeping forward, let it finish on its own.
How to Fix Attempting Data Recovery on iPhone: Step-by-Step
If your device remains completely frozen for several hours or cycles through a continuous boot loop, active intervention is required. Here is how to fix attempting data recovery on iphone using proven, non-destructive techniques.
Golden Rule: Always prioritize update options over restore options in Finder or iTunes to protect your personal files from being erased.
Method 1: Perform a Force Restart (Hard Reset)
A hardware force restart cuts power to the processor and clears temporary cache memory, breaking minor boot loops without modifying your stored files.
Follow the specific button sequence for your hardware model:
- iPhone 8, iPhone X, iPhone 11, 12, 13, 14, 15, 16, and SE (2nd/3rd Gen): Press and quickly release Volume Up. Press and quickly release Volume Down. Press and hold the Side Power button continuously until the Apple logo appears, then release.
- iPhone 7 and iPhone 7 Plus: Press and hold both the Volume Down button and the Sleep/Wake button simultaneously until the Apple logo displays.
- iPhone 6s, SE (1st Gen), and iPads with Home Buttons: Press and hold both the Home button and the Top (or Side) Power button together until you see the Apple logo.
- iPads Without Home Buttons: Press and quickly release Volume Up. Press and quickly release Volume Down. Press and hold the Top Power button until the device restarts.
Method 2: Update Firmware via Recovery Mode (Preserves Data)
If a hard reset fails to resolve the loop, connecting your iPhone to a computer allows you to reinstall the operating system firmware cleanly without touching your personal photos or messages.
Follow these precise steps:
- Launch Apple Finder on macOS Catalina or later, or open iTunes / Apple Devices app on Windows.
- Connect your iPhone to the computer using a high-quality USB cable.
- Put your device into Recovery Mode: Press and quickly release Volume Up, press and quickly release Volume Down, then press and hold the Side button. Continue holding even when the Apple logo appears, releasing only when the computer-and-cable Recovery Mode graphic shows on screen.
- A dialog prompt will appear on your computer screen stating there is a problem with the iPhone.
- Crucial Step: Click Update (NOT Restore). Clicking Update instructs your computer to reinstall iOS without wiping your personal user data.
- Wait for your computer to download the latest firmware package. If the download takes longer than fifteen minutes, your phone may exit recovery mode. Simply repeat the button sequence once the download finishes.
Method 3: Deploy Dedicated iOS Repair Software (Standard Repair)
When native iTunes or Finder updates fail with mysterious error codes like Error 14 or Error 4013, specialized iOS repair tools provide a reliable alternative. These platforms extract clean IPSW firmware packages and rebuild corrupted boot sectors using automated repair scripts that preserve user files.
Reviews of the Top 8 iOS System Recovery Tools
We evaluated the leading software utilities designed to resolve iOS update crashes, boot loops, and recovery screen hangs. Here are reviews of eight dependable tools for Windows and macOS.
1. Tenorshare Reiboot
Tenorshare ReiBoot is widely regarded as one of the most reliable third-party utilities for fixing iOS system glitches. It is built specifically to address boot loops, frozen screens, and update errors.
ReiBoot offers a clean, modern interface featuring a one-click entry and exit for Recovery Mode completely free of charge. For deep system errors like recovery loops, its Standard Repair mode downloads verified Apple firmware and repairs underlying system partitions without wiping photos, messages, or apps.
The software supports the latest iOS versions and iPadOS releases. Its automated diagnostic engine identifies whether a crash stems from storage exhaustion or corrupted system daemons, guiding users through a straightforward repair process.
Primary Advantage: Intuitive Standard Repair feature that resolves persistent recovery screen loops with zero data loss.
2. iMyFone Fixppo
iMyFone Fixppo is a versatile iOS repair suite designed to resolve over one hundred and fifty distinct Apple system issues without requiring technical expertise.
Fixppo features three operational modes: Standard Mode, Advanced Mode, and a dedicated Reset tool. Standard Mode resolves frozen update screens, recovery loops, and Apple logo hangs while keeping all personal media completely intact. The tool automatically detects your connected device model and suggests the optimal firmware package.
The program runs smoothly on both Windows and macOS systems. It includes clear on-screen instructions showing exact hardware button timings for entering Recovery Mode and DFU mode across all iPhone generations.
Primary Advantage: Clear on-screen hardware button guidance and reliable Standard Mode data-preserving repairs.
3. Dr.Fone System Repair
Dr.Fone System Repair, developed by Wondershare, is an established utility backed by more than a decade of mobile software engineering. It provides comprehensive repair capabilities for iOS and iPadOS devices.
The software addresses complex firmware crashes resulting from interrupted updates, failed downgrades, or jailbreak conflicts. Its Standard Repair mode downloads official Apple firmware packages and reinstalls system components without erasing stored device data. It also allows users to downgrade iOS versions without requiring complex manual IPSW flashing.
Dr.Fone features an approachable visual wizard that explains each step clearly, making it well suited for non-technical users seeking a straightforward recovery process.
Primary Advantage: Comprehensive iOS system repair backed by approachable wizards and firmware downgrade support.
4. TunesKit iOS System Recovery
TunesKit iOS System Recovery is a lightweight, efficient repair program engineered to fix common iOS, iPadOS, and tvOS operational faults quickly.
TunesKit specializes in resolving frozen recovery screens, white screen of death, and repetitive reboot cycles. It provides a Standard Mode that repairs over thirty common update glitches without touching existing user data. The tool includes a free feature to enter or exit Recovery Mode with a single mouse click.
The software features high compatibility across older iPhone models as well as the latest flagship releases, providing consistent repair success rates.
Primary Advantage: Fast, lightweight repair engine with single-click Recovery Mode management and broad device support.
5. AnyFix iOS System Recovery
AnyFix by iMobie is an all-in-one system repair and iTunes troubleshooting suite designed to address a wide spectrum of Apple device errors.
AnyFix categorizes repairs into three distinct intensity levels: Standard Repair, Advanced Repair, and Ultimate Repair. Standard Repair handles recovery screen hangs, frozen update bars, and boot failures without data loss. Additionally, AnyFix includes dedicated modules to diagnose and resolve over two hundred iTunes sync and connection errors.
This dual capability makes AnyFix particularly effective when your recovery loop was triggered by an underlying iTunes connection failure on your desktop computer.
Primary Advantage: Integrated repair suite that fixes both iOS firmware errors and desktop iTunes connection faults.
6. Apple iTunes / Apple Devices App
Apple iTunes (and the modern Apple Devices app on Windows 11) is the official, native management software provided directly by Apple for Windows computers.
iTunes provides complete access to official Apple firmware downloads and device recovery protocols. When an iPhone enters Recovery Mode, iTunes automatically detects the device and offers the option to update or restore. Because it is developed by Apple, it communicates natively with hardware micro-controllers and security enclaves.
While iTunes can occasionally throw cryptic numeric error codes when cables are loose, it remains completely free and represents the official baseline tool for iOS maintenance.
Primary Advantage: Completely free official Apple utility with direct access to signed firmware and native security enclave protocols.
7. Apple Finder
On macOS Catalina and all subsequent macOS versions, Apple integrated iPhone and iPad device management directly into the native macOS Finder sidebar.
When you connect an iPhone stuck on a recovery screen to your Mac, Finder immediately displays a recovery banner. Clicking the Update button triggers a clean, background download of official Apple firmware. Finder verifies cryptographic signatures directly against Apple servers, ensuring clean installation.
Finder is completely free, built directly into the operating system, and requires zero third-party software installations, making it the premier choice for Mac owners.
Primary Advantage: Native, built-in macOS interface with smooth firmware downloading and reliable data-preserving updates.
8. FonePaw iOS System Recovery
FonePaw iOS System Recovery is an approachable repair tool designed to help everyday iPhone users overcome boot errors and system freezes.
FonePaw guides users through entering Recovery Mode and DFU mode with clear visual diagrams. Its Standard Mode fixes system crashes resulting from failed updates, frozen screens, and headphone mode bugs without erasing local files. It also offers firmware optimization that frees up minor system cache space.
The software provides a clean, distraction-free interface suitable for users who want a quick, guided resolution to recovery screen freezes.
Primary Advantage: Clean visual workflow with step-by-step connection wizards for non-technical computer users.
Feature & Recovery Capability Comparison Table
Comparing top iOS recovery solutions side by side highlights pricing models, data preservation capabilities, and platform support. The table below outlines key technical specifications across all eight platforms.
| Tool Name | Data-Preserving Repair | Supported OS | Free Recovery Mode Entry | Pricing Model |
|---|---|---|---|---|
| Tenorshare ReiBoot | Yes (Standard Repair) | Windows, macOS | Yes (1-Click Free) | Freemium ($39.95/mo) |
| iMyFone Fixppo | Yes (Standard Mode) | Windows, macOS | Yes (Free Entry) | Freemium ($29.99/mo) |
| Dr.Fone System Repair | Yes (Standard Mode) | Windows, macOS | Limited | Freemium ($59.95/yr) |
| TunesKit iOS Recovery | Yes (Standard Mode) | Windows, macOS | Yes (1-Click Free) | Freemium ($39.95/yr) |
| AnyFix by iMobie | Yes (Standard Repair) | Windows, macOS | Yes (1-Click Free) | Freemium ($35.99/yr) |
| Apple iTunes | Yes (Update Button) | Windows | Manual Hardware Buttons | 100% Free Official |
| Apple Finder | Yes (Update Button) | macOS | Manual Hardware Buttons | 100% Free Built-in |
| FonePaw System Recovery | Yes (Standard Mode) | Windows, macOS | Free Diagnostics | Freemium ($34.96/mo) |
What to Do When “Data Recovery Cannot Be Completed” Displays
In some update scenarios, the recovery script fails and displays an explicit error message stating that data recovery cannot be completed. This alert indicates that iOS attempted multiple database salvage passes but could not reconstruct key file allocation indexes.
When this alert appears, do not panic. Follow this recovery sequence:
1. Press the Home Button or Swipe Up
Below the error message, iOS typically prompts you to press the Home button or swipe up to enter your passcode. Enter your device passcode carefully. In many instances, entering the passcode unlocks the cryptographic keychain, allowing iOS to finalize file migration and boot directly into your home screen.
2. Check for Tablet Specific Warnings
When encountering data recovery cannot be completed ipad alerts, connect your iPad to your computer via USB. Perform an Update command in Finder or iTunes. If your tablet still fails, the internal storage was likely too full to unpack firmware archives.
3. Restore from Cloud or Computer Backups
If the device remains inaccessible after entering your passcode, clean reinstallation becomes necessary. Put the device into Recovery Mode and select Restore in Finder or iTunes. This action wipes the device firmware cleanly. Once the initial setup screen displays, select Restore from iCloud Backup or Restore from Mac/PC Backup to restore all your files safely.
Pro-Tip: Always Keep 10GB of Free Space Before Major iOS Updates
The vast majority of recovery screen crashes stem from insufficient local storage. Before tapping install on any major iOS upgrade, navigate to Settings > General > iPhone Storage. Ensure your device has at least ten gigabytes of available free space. If space is tight, offload large apps or temporarily delete downloaded video content to provide ample room for firmware extraction.
Pre-Update Safety Checklist
Before launching your next iOS software update, run through this preventative safety checklist:
Pre-Update Checklist
- Verified full device backup generated via iCloud or encrypted local Finder/iTunes backup.
- At least 10 gigabytes of internal storage freed up in device settings.
- Device connected to high-output wall power with at least 50% battery charge.
- Connected to a reliable, high-speed Wi-Fi network without public captive portals.
- Beta profiles removed if updating back to stable production releases.
- Computer operating system and iTunes / Apple Devices app updated to current versions.
- High-quality Apple-certified USB cable ready for computer troubleshooting if needed.
Frequently Asked Questions
How long should the “Attempting data recovery” process take?
Under normal circumstances, the process takes between fifteen minutes and one hour. The duration depends heavily on your device storage capacity and the volume of photos, messages, and app databases being migrated. If the progress bar is slowly advancing, let the phone remain plugged into wall power until it finishes.
Will doing a force restart delete any personal files on my iPhone?
No. A force restart (hard reset) simply cuts hardware power and reboots the processor. It does not erase your photos, contacts, messages, or apps. It is a completely safe first-line troubleshooting step when your phone freezes or enters a recovery loop.
What is the difference between clicking “Update” and “Restore” in Finder?
Clicking Update reinstalls clean iOS firmware while keeping your personal data, apps, and settings completely intact. Clicking Restore completely erases your iPhone internal storage, resetting the device back to original factory defaults. In addition, you should always choose Update first when resolving recovery loops.
Why did my iPad get stuck on attempting data recovery?
iPads run on iPadOS, which shares the same underlying Apple File System (APFS) architecture as iPhones. An iPad triggers this screen when an over-the-air update is interrupted, when storage runs critically low, or when restoring a corrupted backup. Troubleshooting steps remain identical to iPhone procedures.
Can third-party iOS repair tools really fix recovery loops without data loss?
Yes. Reputable iOS system repair platforms like Tenorshare ReiBoot and iMyFone Fixppo use Standard Repair algorithms that download official Apple firmware packages and repair system partitions without touching the user data partition. They provide an automated alternative when iTunes encounters connection errors.
Conclusion: Restore Your iPhone Safely Without Data Loss
Encountering a recovery screen during an iOS update is stressful, but it rarely indicates permanent device failure. In most situations, your device is merely working to repair and migrate internal databases after an unexpected installation glitch.
Start with patience by allowing the progress bar adequate time to complete. If the screen remains frozen or cycles continuously, perform a hardware force restart. If the loop persists, connect your phone to a computer and choose the Update option in Finder or iTunes to reinstall firmware while safeguarding your personal data.
By keeping ample free storage space before updating and maintaining consistent iCloud or local backups, you can navigate iOS upgrades smoothly and keep your digital memories safe from harm.