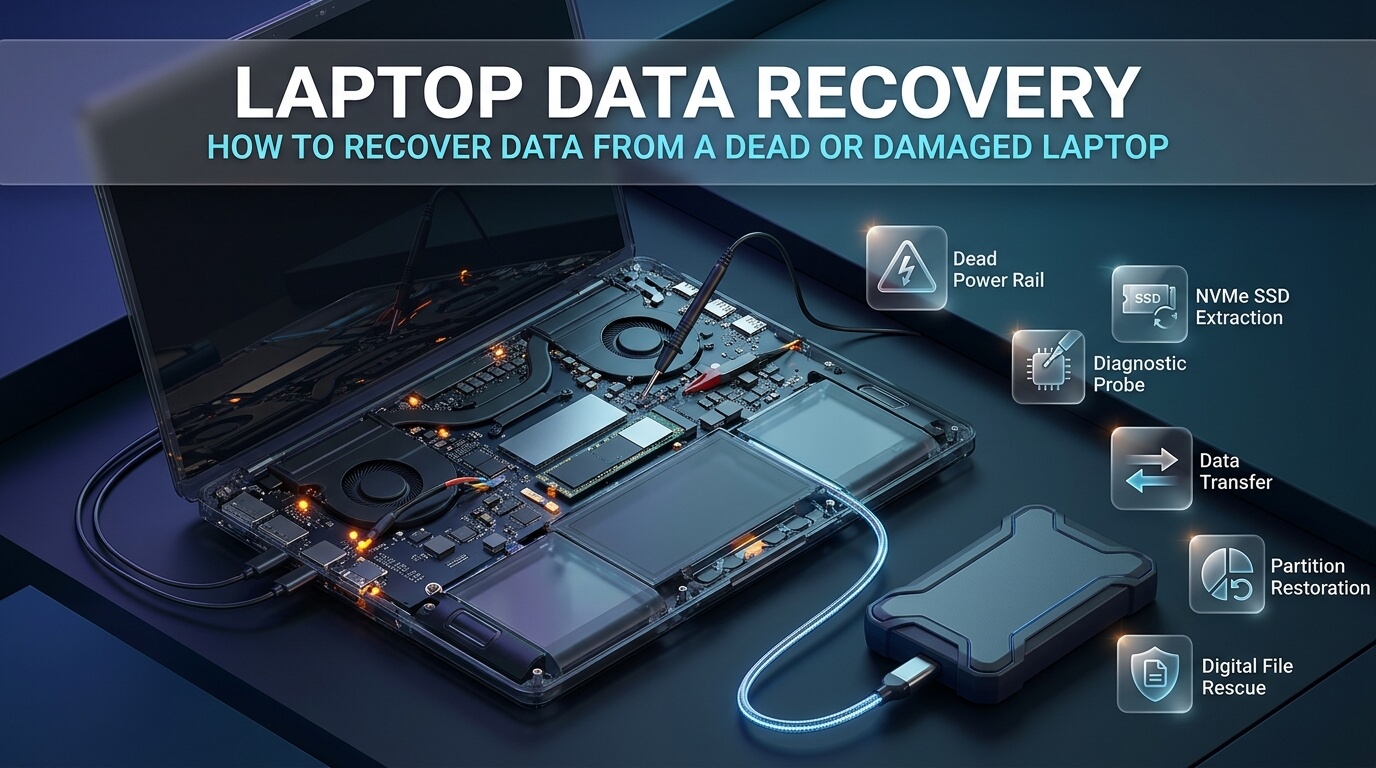
Laptops serve as our primary workstations, creative hubs, and communication gateways. We carry them through airport security gates, balance them on coffee shop counters, and transport them in backpacks across daily commutes. Because of their portability, portable notebooks endure tremendous physical stress. Drops from desks, spilled morning coffee, damaged charging ports, and sudden motherboard failures can strike at any moment. When your notebook suddenly refuses to turn on, displays a persistent black screen, or shuts off with an alarming spark, the initial panic is overwhelming. Fortunately, professional laptop data recovery techniques can rescue your valuable files even when the computer itself never powers on again.
A dead laptop rarely equals dead data. In the vast majority of laptop hardware catastrophes, the failure originates in the power charging circuitry, motherboard chipset, cooling fan, or display backlight, while the internal storage drive remains completely untouched and healthy. Whether you need to execute rapid data recovery from dead laptop motherboards, salvage business records after a liquid spill, or locate certified cleanroom specialists, understanding your recovery options saves both time and money. With the right tools and a disciplined approach, extracting your personal files, family photos, and critical business documents is a manageable task.
This comprehensive guide details the exact diagnosis process for non-booting notebooks, explains how to pull drives from broken chassis, compares top laptop data recovery software platforms, and reviews professional cleanroom laboratory solutions. Whether you plan a DIY data recovery laptop workflow using a USB enclosure or need professional guidance on executing data recovery from laptop machines with shattered screens, this guide gives you the technical knowledge required to restore your data safely.
- A Dead Laptop Does Not Mean Dead Data: In over 80% of laptop hardware failures, the internal SSD or hard drive is completely undamaged.
- Stop Attempting Power Restarts on Liquid Damage: If coffee or water spilled on your notebook, never plug in the AC adapter. Pressing power can short circuit the storage controller.
- Identify Storage Architecture Early: Check whether your laptop uses a removable M.2 NVMe drive, a 2.5-inch SATA drive, or soldered motherboard NAND flash memory.
- Locate Your BitLocker Key First: Most modern Windows 11 notebooks enable BitLocker encryption automatically. Have your Microsoft account recovery key ready before pulling the drive.
- Clone Extracted Drives Immediately: Before running intensive deep scans on an extracted drive, create a byte-to-byte clone to prevent mechanical or flash degradation.
Diagnosing Your Dead or Damaged Laptop: Where Did It Fail?
Before unscrewing any casing or buying recovery adapters, you must determine whether the issue is an operating system crash, a motherboard failure, or physical storage destruction. This diagnosis dictates the safest restoration route.
Power Delivery and Motherboard Failures
If your notebook shows zero LED charging lights, makes no fan noise, and fails to respond when you press the power button, the issue is almost certainly electrical. Typical causes include a blown input MOSFET on the motherboard, a cracked DC charging jack, a failed battery management chip, or a dead external AC power brick.
In these scenarios, the internal storage drive has suffered no physical trauma. It sits in a powered-down, pristine state. Removing the internal drive and placing it into an external USB enclosure allows you to access all your files instantly from any functioning desktop or laptop computer.
Display Panel, Inverter, and GPU Breakdowns
Sometimes a laptop appears dead, but the internal hardware is actually running normally. If you power on the computer and hear cooling fans spinning, notice keyboard backlighting turn on, or hear the familiar Windows startup chime, but the screen stays pitch black, your display panel or integrated graphics chip has failed.
Before disassembling anything, connect an external computer monitor or TV to the laptop’s HDMI, DisplayPort, or USB-C Thunderbolt port. In many cases, the external monitor will display your desktop immediately. You can then plug in an external USB flash drive and back up your critical files within minutes without opening the laptop chassis.
Operating System Crashes and Blue Screen Boot Loops
If the notebook powers on, shows the manufacturer logo (such as Dell, Lenovo, HP, or Asus), but freezes on a blue screen of death (BSOD) or enters an infinite “Automatic Repair” loop, the hardware is functional. The problem stems from corrupted Windows system files, broken registry hives, or bad device drivers.
Here, you do not need to disassemble the laptop hardware. Instead, you can boot the machine using an emergency bootable live USB drive (such as Hiren’s BootCD PE or a Linux Live USB) and copy files to an external drive. Alternatively, you can use specialized laptop hard drive data recovery software to extract lost partitions.
Liquid Spills and Moisture Infiltration
Liquid spills are the most dangerous hazard for portable computers. Water, sugary soda, and acidic coffee seep through keyboard membranes directly onto the motherboard below. Minerals in the liquid cause instantaneous electrical short circuits, while acidic compounds rapidly corrode delicate copper traces and solder joints.
If liquid enters your laptop, unplug the charger cable immediately. Hold down the power button for 10 seconds to force an emergency power shutdown. Never attempt to power on the machine to “see if it still works,” and do not use a hot hair dryer, which melts plastic keys. Unplug the internal battery connector and extract the storage drive before corrosion spreads to the storage pins.
Physical Drops and Impact Damage
Laptops dropped while operating experience distinct damage depending on whether they contain a traditional mechanical hard disk drive (HDD) or a modern solid-state drive (SSD). If an older notebook contains a mechanical 2.5-inch hard drive, dropping the unit while platters are spinning at 5,400 RPM almost always causes a head crash. The flying read heads slam directly into the magnetic platters, gouging concentric rings into the media tracks.
Modern laptops with solid-state drives possess no moving parts, making them far more resilient to drops. However, severe impacts can crack the motherboard PCB or dislodge the M.2 socket connector, requiring careful inspection during drive extraction.
Storage Form Factors: Removable vs Soldered Laptop Drives
Understanding what kind of storage resides inside your notebook determines your extraction workflow. Over the past decade, laptop internal architecture has undergone massive changes.
Traditional 2.5-Inch SATA Hard Drives and SSDs
Standard in older notebooks and budget desktop-replacement models, 2.5-inch drives connect via a standard SATA data and power connector. These drives are encased in aluminum or plastic enclosures and secured inside a drive caddy with four screws. Once removed, they can be plugged into any affordable USB-to-SATA adapter cable.
M.2 NVMe and M.2 SATA Solid-State Drives
The vast majority of modern Windows notebooks manufactured over the past eight years utilize M.2 solid-state drives (typically the M.2 2280 form factor, measuring 22mm wide by 80mm long). These tiny stick-of-gum drives plug into a dedicated PCIe slot on the motherboard and are secured by a single Phillips retaining screw.
To access an extracted M.2 drive, you will need a dual-protocol USB-C M.2 NVMe/SATA enclosure. These portable aluminum enclosures cost between $15 and $25 and turn your extracted laptop SSD into an ultra-fast external USB drive.
Soldered Storage (Apple Silicon MacBooks and Budget Chromebooks)
Certain ultrabooks, including all Apple MacBook Air and MacBook Pro models with M1, M2, M3, or M4 processors, feature soldered storage. Apple solders raw NAND flash memory chips directly to the main logic board alongside the processor. The SSD controller resides inside the Apple Silicon system-on-a-chip (SoC), meaning there is no physical drive card to unplug.
For laptops with soldered storage, DIY drive extraction is impossible. Recovering data requires board-level micro-soldering to repair the logic board’s primary power circuits, or utilizing Apple DFU (Device Firmware Update) mode and Apple Configurator to share the disk image with another Mac.
Method 1: Software Recovery for Semi-Functional Laptops
If your laptop powers on and passes the initial BIOS/UEFI boot test, but Windows refuses to launch or gets stuck in a blue screen repair loop, software-based recovery is your fastest path.
Creating an Emergency Bootable USB Drive
When the internal Windows operating system is corrupted, you cannot boot into your desktop to run standard desktop programs. The solution is to boot from an independent operating system running entirely inside a USB flash drive’s memory.
- On a working secondary computer, download the ISO image of an emergency recovery toolkit, such as Hiren’s BootCD PE or a bootable rescue USB created by EaseUS or Disk Drill.
- Use a free utility like Rufus to write the ISO image onto a clean 16 GB or 32 GB USB flash drive.
- Insert the bootable USB drive into your broken laptop.
- Power on the laptop and immediately tap the boot menu key (F12 on Dell, F9 on HP, F12 on Lenovo, F8 on Asus, or Option on Intel MacBooks).
- Select your USB flash drive from the boot options.
- The laptop will load a lightweight live desktop environment into RAM without touching the corrupted Windows installation on your internal drive.
- Connect an external backup hard drive to another USB port. Open the file manager inside the live environment, browse to your internal drive (typically mounted under `C:\Users\YourUsername\`), and copy your Desktop, Documents, and Pictures folders directly to the external drive.
If the internal drive partitions show as RAW or unreadable inside the live environment, launch the included laptop hard drive data recovery software to perform an automated sector scan.
Method 2: Physical Hard Drive Extraction from a Completely Dead Laptop
When a laptop suffers a burned motherboard, failed power circuitry, or total liquid destruction, extracting the physical drive is the most effective DIY method. Here is how to complete the extraction safely.
Required Tools and Preparation
Before beginning, gather the appropriate tools:
- A precision electronics screwdriver set (including PH00, PH0, PH1, and Torx T5/T6 bits).
- A plastic spudger or guitar pick to separate plastic casing snaps without scratching.
- An anti-static wrist strap or a habit of periodically touching an unpainted metal surface to discharge static electricity.
- A compatible USB external drive adapter (USB-to-SATA cable for 2.5-inch drives, or a USB-C M.2 NVMe enclosure for modern SSDs).
- A healthy secondary desktop or laptop computer to read the extracted drive.
Step-by-Step Drive Extraction Procedure
- Disconnect All Power: Unplug the AC power adapter, USB peripherals, and memory cards. If your laptop features an external removable battery, unlatch and slide it out.
- Remove the Bottom Cover: Flip the notebook over on a soft towel. Remove all perimeter screws. Note that some laptops have hidden screws beneath rubber anti-slip feet. Keep screws organized by length, as corner screws are often longer than center screws.
- Pry the Seams Gently: Insert your plastic spudger into the seam between the bottom shell and the palmrest. Work your way around the edges, releasing the plastic retaining clips. Lift the bottom cover away.
- Disconnect the Internal Battery: Before touching any internal components, locate the internal battery cable connecting to the motherboard. Gently pull the connector straight back to kill all standby voltage.
- Locate and Extract the Storage Drive:
- For M.2 NVMe SSDs: Locate the small rectangular circuit board. Remove the single retaining screw at the back end. The M.2 stick will gently pop up at a 30-degree angle. Pull the stick straight out of the socket.
- For 2.5-inch Drives: Remove the screws securing the metal drive caddy to the laptop frame. Gently pull the drive away from the SATA interface cable.
- Mount into Your USB Enclosure: Place the extracted M.2 SSD or 2.5-inch drive into your external USB adapter enclosure. Secure the cover and tighten any mounting screws.
- Connect to Secondary Computer: Plug the USB cable into your working secondary computer. The computer should recognize the device as a new external storage drive.
When you browse an extracted laptop drive on a secondary computer, Windows may display an error message stating: “You don’t currently have permission to access this folder.” Click “Continue.” Windows will spend a minute updating folder security permissions, granting your current user account read access to the old user directory (`D:\Users\Username\`).
Accessing BitLocker Encrypted Drives
Modern laptops shipping with Windows 10 or Windows 11 Home and Pro often activate BitLocker device encryption automatically. When you connect an extracted drive to a second PC, Windows will display a golden lock icon over the drive letter and state: “This drive is BitLocker-protected.”
You cannot bypass this encryption without the 48-digit numerical recovery key. To retrieve your key:
- Visit `https://account.microsoft.com/devices/recoverykey` on any smartphone or web browser.
- Log in with the identical Microsoft account used on your broken laptop.
- Match the Key ID displayed on your screen to find the matching 48-digit recovery key.
- Enter the numbers into the prompt. The drive decrypts instantly, allowing normal file copying.
Method 3: Professional Cleanroom and Micro-Soldering Services
DIY methods have limits. When hardware damage affects the storage medium itself, attempting to force read operations causes irreversible data destruction. In these scenarios, engaging certified laptop data recovery services is the only responsible choice.
When to Seek Professional Lab Assistance
Contact a certified recovery laboratory under these critical conditions:
- The Laptop Hard Drive Clicks or Buzzes: If you extract a mechanical hard drive and it emits rhythmic metallic clicking or grinding noises upon connecting to USB, the read-write head assembly is physically damaged. Continued spinning scrapes platters, destroying data forever.
- The Extracted SSD Shows Zero Bytes or Wrong Model: If your extracted M.2 SSD registers as an uninitialized disk with zero bytes, or shows generic controller names (like “SMI Controller” or “Phison PS5012”), the SSD controller firmware has crashed. Specialized PC-3000 Flash hardware is required to rebuild the translation tables in factory safe mode.
- Soldered MacBooks with Severe Liquid Infiltration: If your Apple Silicon MacBook is completely dead from a beverage spill, a skilled micro-soldering technician must clean ultrasonic corrosion, replace shorted capacitors, and restore stable power rails to allow the system to boot into target disk recovery mode.
- Severe Fire, Thermal, or Impact Destruction: Vehicles accidents, fires, or catastrophic crushing require specialized cleanroom component reconstruction.
Evaluating Local Providers: Finding Laptop Data Recovery Near Me
When searching online for laptop data recovery near me, exercise caution. Many local computer repair shops advertise data recovery, but they possess only basic consumer software. If your drive has internal head damage, a general repair shop will plug it in, run off-the-shelf software, and grind away your magnetic platters before admitting defeat.
When vetting a data recovery facility, verify these technical credentials:
- On-Site Certified Cleanroom: Confirm that the provider operates an ISO 5 Class 100 cleanroom environment on their own premises, rather than shipping your drive across the country to a third-party subcontractor.
- No Data, No Fee Policy: Ethical recovery labs provide free diagnostic evaluations and charge labor fees only if they successfully extract the specific files you need.
- Hardware Imagers: Ensure they utilize dedicated hardware write-blockers and forensic imaging tools (such as DeepSpar or PC-3000) that can handle degrading drives without crashing.
- Clear Upfront Pricing Tiers: Legitimate providers offer transparent price estimates based on the physical fault rather than arbitrary hourly rates.
Top 8 Laptop Data Recovery Tools & Bootable Environments
Here are eight industry-leading software utilities and bootable emergency toolkits designed to extract data from corrupted partitions, unbootable laptops, and extracted internal drives.
1. Disk Drill
Disk Drill by CleverFiles is a premier data recovery solution that excels at recovering files from extracted laptop drives, external enclosures, and corrupted partitions. It supports all primary file systems, including NTFS, FAT32, exFAT, APFS, and ext4.
Disk Drill features a dedicated byte-to-byte disk backup tool. When dealing with an extracted laptop drive that displays bad sectors or sluggish performance, you can create a complete DMG or ISO image file first. You can then run deep scans on the virtual image safely without stressing the fragile physical hardware. Its sophisticated signature scanner recognizes over 400 file extensions, reconstructing documents, raw photos, and videos with original file names.
- Platform: Windows, macOS
- Key Strengths: Integrated byte-to-byte disk imaging, clean interface, comprehensive file previews
- Laptop Support: Recovers extracted SATA HDDs, M.2 NVMe SSDs, and BitLocker volumes
- Free Tier: Free preview of all files; up to 500 MB free data recovery on Windows
- Best Use Case: Users scanning extracted laptop drives who want safe disk cloning and reliable file signature reconstruction
2. EaseUS Data Recovery Wizard
EaseUS Data Recovery Wizard is an intuitive recovery platform designed for users who want an automated, guided restoration experience. It is especially useful for recovering lost files from unbootable laptops through its bootable WinPE media creator.
The software features an automated dual-scan system. It initiates a rapid surface scan to catch existing directory pointers, followed by a sector-by-sector deep scan that searches raw sectors for missing file headers. EaseUS includes built-in repair tools that automatically reconstruct damaged photo and video files that become truncated during sudden laptop shutdowns.
- Platform: Windows, macOS
- Key Strengths: Built-in WinPE emergency bootable USB builder, automatic photo/video repair
- Laptop Support: Works on internal notebook drives, USB enclosures, and memory cards
- Free Tier: Recovers up to 2 GB of data for free (with in-app social share)
- Best Use Case: Everyday users who want to create a bootable USB to recover an unbootable Windows notebook without removing screws
3. Stellar Data Recovery
Stellar Data Recovery is an established data restoration package with over 30 years of engineering pedigree. Its Professional and Premium editions include specialized tools for recovering data from crashed or unbootable computers.
Stellar allows you to generate an emergency bootable recovery USB that launches a customized restoration environment on laptops suffering from operating system boot errors. It also provides advanced support for BitLocker-encrypted laptop drives, prompting for your recovery key and scanning the decrypted volume smoothly. Its SMART monitoring module tracks drive temperature and bad sector degradation during active scans.
- Platform: Windows, macOS
- Key Strengths: Crashed system bootable recovery drive, BitLocker decryption support, SMART monitoring
- Laptop Support: Full support for M.2 NVMe, SATA SSDs, legacy laptop HDDs, and RAID laptops
- Free Tier: Recovers up to 1 GB of data for free on Windows
- Best Use Case: Business notebooks with BitLocker encryption or unbootable Windows systems requiring guided recovery
4. R-Studio Data Recovery
R-Studio is an enterprise-grade forensic data recovery platform engineered specifically for IT technicians, system administrators, and digital investigators. It provides unprecedented control over low-level drive parameters and raw partition structures.
R-Studio features an emergency bootable version (R-Studio Emergency) that boots directly from a USB stick, allowing technicians to recover files across a local network without disassembling the laptop. It includes an advanced disk hex editor, virtual partition reconstruction, and deep parameter controls for multi-pass disk cloning around bad sectors.
- Platform: Windows, macOS, Linux
- Key Strengths: R-Studio Emergency bootable USB, network recovery, surgical bad-sector imaging
- Laptop Support: Deep recovery across complex partition schemes, dynamic disks, and virtual machines
- Free Tier: Demo mode allows inspection, hex analysis, and recovery of files under 256 KB
- Best Use Case: IT professionals and corporate technicians needing surgical, low-level recovery controls on damaged laptop storage
5. Wondershare Recoverit
Wondershare Recoverit is a versatile recovery application with a strong focus on media restoration and system crash recovery. Its interface guides users through a clean, step-by-step process that minimizes technical friction.
Recoverit includes a dedicated “System Crash Computer” mode that guides users through creating a bootable USB drive to extract files from unbootable laptops. It also features an advanced video recovery engine that reconstructs fragmented high-resolution 4K and 8K video files that were interrupted during rendering or editing when a laptop crashed.
- Platform: Windows, macOS
- Key Strengths: Streamlined crashed PC recovery wizard, fragmented video splicing engine
- Laptop Support: Works on extracted laptop SSDs, external backup drives, and SD cards
- Free Tier: Free scanning and preview; up to 100 MB free data recovery
- Best Use Case: Videographers, creative freelancers, and students needing an easy wizard to pull multimedia from a dead laptop
6. Hiren’s BootCD PE
Hiren’s BootCD PE (Preinstallation Environment) is an emergency bootable rescue disk based on Windows 10 PE x64. It is widely considered an indispensable utility among IT support technicians worldwide.
When written to a USB drive using Rufus, Hiren’s BootCD PE boots unbootable laptops into a complete Windows desktop environment loaded with hardware diagnostic, partition management, and data recovery tools. It includes open-source and freeware utilities like PhotoRec, TestDisk, Recuva, DMDE, and Lazesoft Recovery Suite. You can connect to Wi-Fi, mount internal drives, reset forgotten Windows local passwords, and transfer files across local networks or USB drives.
- Platform: Windows PE (Bootable from USB on any x64 PC)
- Key Strengths: Complete live Windows desktop environment, bundled with dozens of diagnostic and recovery utilities, 100% free
- Laptop Support: Universal UEFI and legacy BIOS compatibility across modern and legacy laptops
- Free Tier: 100% free community-supported project
- Best Use Case: Anyone dealing with an unbootable Windows laptop who wants a free, all-in-one live diagnostic and file transfer environment
7. TestDisk
TestDisk is a celebrated open-source command-line partition recovery tool developed by Christophe GRENIER. Unlike traditional software that merely extracts files, TestDisk specializes in repairing broken partition maps in place to make unbootable laptops bootable again.
TestDisk can locate lost or deleted partitions across NTFS, FAT32, exFAT, and Linux ext4 file systems. It can rebuild corrupt NTFS boot sectors from backup copies, fix broken Master File Tables, and restore damaged Master Boot Records. Because it runs lightweight text console binaries, it can be launched from emergency bootable USBs or command prompts with minimal overhead.
- Platform: Windows, macOS, Linux, DOS
- Key Strengths: In-place partition table restoration, boot sector repair, 100% free open source
- Laptop Support: Repairs broken boot partitions, corrupt EFI system partitions, and RAW drives
- Free Tier: 100% free and open source with zero limits
- Best Use Case: Advanced users looking to fix broken partition tables in place and restore an unbootable laptop without copying terabytes of data
8. PhotoRec
PhotoRec is the companion data carving utility bundled alongside TestDisk. While TestDisk focuses on partition structures, PhotoRec is a raw signature carver designed to recover files from severely corrupted, formatted, or unmountable laptop drives.
PhotoRec completely ignores the underlying file system. It reads the raw storage sectors sequentially, searching for over 480 recognized file headers and footers. Even if the laptop hard drive partition table is wiped, the file allocation tables are destroyed, and the operating system recognizes only unallocated space, PhotoRec can extract intact documents, photos, audio tracks, and compressed archives. Its read-only architecture ensures that no write operations harm failing media.
- Platform: Windows, macOS, Linux
- Key Strengths: Powerful raw file carving, broad file format recognition, 100% free open source
- Laptop Support: Extracts data from RAW, unformatted, and corrupted internal notebook drives
- Free Tier: 100% free with unlimited recovery capacity
- Best Use Case: Users seeking a completely free, unlimited file carving tool to salvage documents and media from an extracted laptop drive
Comparison of Laptop Data Recovery Solutions
The table below provides a quick side-by-side comparison of the leading software utilities, bootable rescue toolkits, and lab services for dead laptop data recovery:
| Solution Name | Type | Bootable USB Option | BitLocker Support | Drive Extraction Needed? | Best Use Case |
|---|---|---|---|---|---|
| Disk Drill | Desktop Software | Mac Only (Target Mode) | Yes (With Key) | Yes (For dead PCs) | Extracted M.2 & SATA laptop drives |
| EaseUS Data Recovery | Software + WinPE | Yes (Pro + Bootable) | Yes (With Key) | No (If using WinPE) | Laptops with software boot failures |
| Stellar Data Recovery | Software + Bootable | Yes (Professional) | Yes (Native Wizard) | No (If using Bootable) | BitLocker laptops & crashed systems |
| R-Studio | Forensic Suite | Yes (R-Studio Emergency) | Yes (Advanced) | No (Network/Emergency) | Technicians & complex network recovery |
| Wondershare Recoverit | Desktop Software | Yes (Crash Recovery) | Yes (With Key) | No (If using Bootable) | Fragmented video & creative files |
| Hiren’s BootCD PE | Live Windows PE | Yes (Full Live Desktop) | Yes (Built-in BitLocker tool) | No (Runs directly in RAM) | Free complete diagnostic & file backup |
| TestDisk | Partition Repair | Via Live Linux / PE | No | Optional | In-place partition table restoration |
| PhotoRec | Signature Carver | Via Live Linux / PE | No (Raw blocks only) | Yes (For dead PCs) | Free unlimited file signature carving |
Costs of Laptop Data Recovery: DIY vs Professional Lab
Evaluating potential expenses early prevents surprises and ensures you match the recovery approach to the financial value of your lost data.
DIY Recovery Equipment Costs ($15 to $100)
If your laptop motherboard is dead but the internal storage drive is undamaged, DIY extraction is remarkably inexpensive:
- USB-to-SATA or M.2 NVMe Enclosure ($15 to $25): A high-speed aluminum external enclosure is all that is required to connect your extracted drive to a secondary computer.
- Precision Screwdriver Set ($10 to $20): A basic magnetic electronics toolkit with PH00 and Torx bits for opening laptop chassis safely.
- Commercial Recovery Software ($0 to $80): If partitions are corrupted or files were accidentally deleted, commercial software licenses cost between $50 and $80. Open-source utilities like PhotoRec and Hiren’s BootCD PE cost $0.
Professional Laboratory Cleanroom Costs ($300 to $2,500+)
When physical storage hardware fails (such as dropped mechanical hard drives or water-damaged soldered MacBooks), professional cleanroom services are mandatory:
- Logical and Minor Firmware Recovery ($300 to $600): Fixing corrupted SSD controller firmware, restoring damaged partition maps, or recovering encrypted volumes with forgotten headers.
- Board-Level Micro-Soldering Repairs ($400 to $900): Ultrasonic cleaning and component repair on liquid-damaged MacBook logic boards to temporarily restore power rails for data extraction.
- Mechanical Head Assembly Replacement ($1,000 to $2,500+): Opening dropped mechanical laptop hard drives in an ISO 5 Class 100 cleanroom, replacing damaged head stack assemblies with donor parts, and reading platters using hardware imagers.
Frequently Asked Questions (FAQs)
Can I recover data from a laptop that will not turn on at all?
Yes, you can recover data from a laptop that will not power on. In the vast majority of cases, total power failure is caused by a dead motherboard, damaged power jack, or blown capacitor, while the internal storage drive remains completely functional. By opening the bottom casing, unscrewing the internal M.2 NVMe SSD or 2.5-inch hard drive, and placing it into an external USB enclosure, you can plug the drive into another computer and access all your files immediately.
How do I recover files from a modern MacBook with a soldered SSD?
Modern MacBooks with Apple Silicon (M1, M2, M3, and M4 chips) have their storage chips permanently soldered to the main logic board, making physical drive removal impossible. To recover data from a dead modern Mac, technicians connect the machine to a second Mac using a Thunderbolt cable and place it into DFU (Device Firmware Update) or Share Disk Mode. If the logic board is dead from liquid damage, a micro-soldering technician must first repair the primary power rails to allow the processor and security enclave to boot.
Where do I find my BitLocker recovery key if my laptop drive is locked?
If you connect an extracted laptop drive to another computer and it asks for a 48-digit BitLocker key, you can find the key stored in the cloud. Open a web browser on any smartphone or computer and log into `account.microsoft.com/devices/recoverykey` using the Microsoft account associated with your broken laptop. The portal will display all registered BitLocker keys alongside their unique Key IDs. Type the matching 48-digit code to decrypt your drive instantly.
Can data be recovered from a water-damaged laptop without fixing the computer?
Yes, data can be recovered without repairing the entire laptop. If the laptop uses a removable M.2 NVMe SSD or 2.5-inch SATA drive, liquid rarely penetrates the protective drive casing or damages the SSD controller unless the computer was submerged for hours. By extracting the drive immediately, cleaning the gold connection pins with isopropyl alcohol, and placing it in an external USB enclosure, you can retrieve your data without spending money to replace the costly laptop motherboard.
How much does professional laptop data recovery typically cost?
Professional laptop data recovery pricing depends on the root cause of the failure. If the issue is logical (such as a corrupted partition or missing file system table), DIY software costs between $50 and $80, or $0 for open-source utilities. If the internal hard drive has mechanical head damage from a physical drop or requires cleanroom platter reading, professional laboratory services typically cost between $500 and $2,000 depending on drive capacity and damage severity.
Conclusion: Building Resilience Against Future Laptop Catastrophes
Experiencing a dead laptop is one of the most frustrating technology disruptions anyone can face. However, remembering that a dead computer rarely means dead data transforms a crisis into a manageable recovery project. By diagnosing failure symptoms systematically, using bootable USB environments for software crashes, and safely extracting removable M.2 or SATA drives for hardware breakdowns, you can restore your valuable files with confidence.
Once your critical files are safely recovered, establish an automated backup system to protect against future hardware mortality. Follow the proven 3-2-1 backup strategy: maintain three copies of your data across two different media types, with at least one copy stored offsite in an encrypted cloud service (such as OneDrive, Google Drive, or Backblaze). Pair cloud synchronization with a local external SSD backup. With automated backups actively running, a spilled beverage or dropped laptop will merely represent an inconvenient hardware replacement rather than the tragic loss of your digital life.