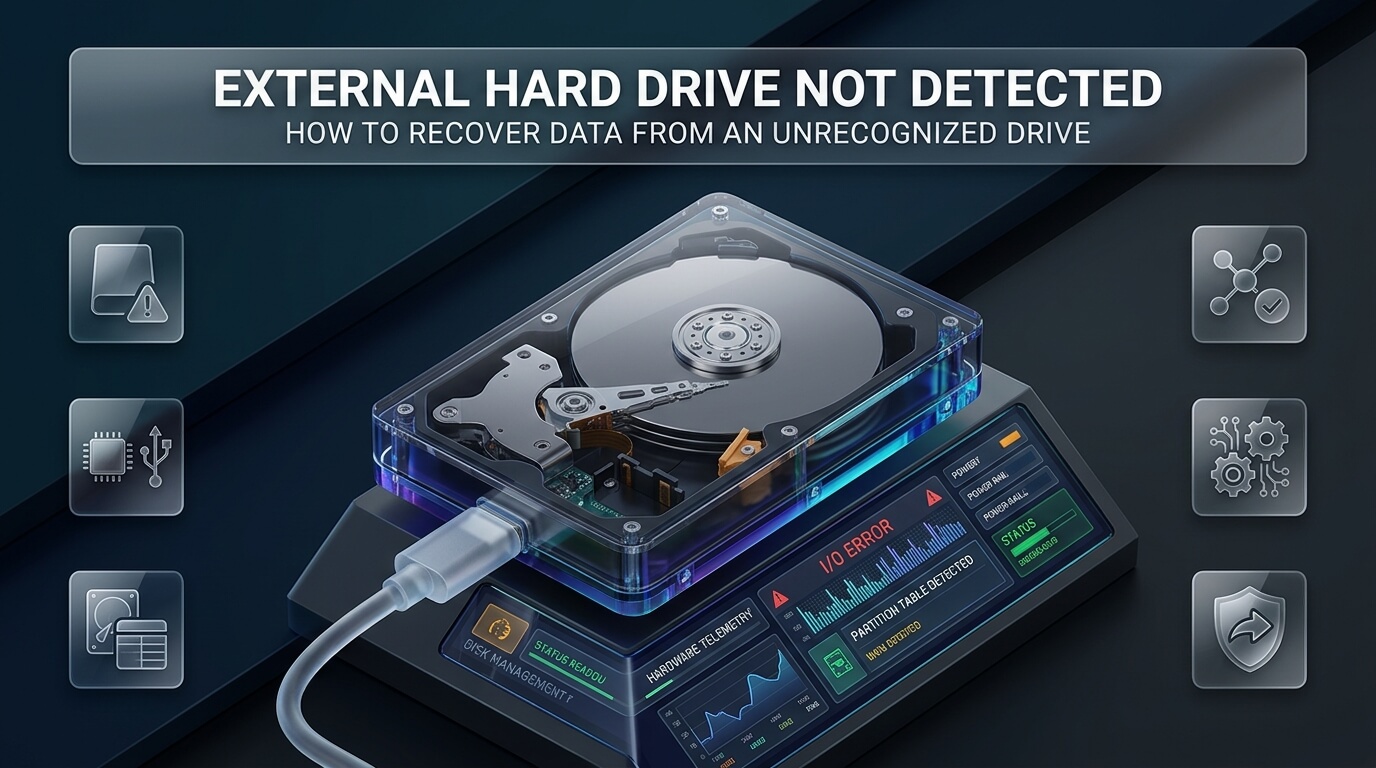
Connecting an external hard drive to your computer only to hear complete silence, an endless clicking loop, or an ominous error message is a terrifying moment. You plug in your Western Digital, Seagate, Toshiba, or Samsung portable drive, expecting your files to appear in File Explorer or Finder. Instead, your operating system alerts you that the device is unrecognized, shows an unallocated disk, or demands that you format the partition before use. In this stressful situation, knowing how to perform external hard drive not detected data recovery protects years of personal memories and critical documents from permanent erasure.
When an external storage drive disappears from your computer, the underlying issue ranges from a damaged USB cable or corrupted partition table to severe mechanical failure. Millions of users accidentally make things worse by clicking “Format disk” or running aggressive repair utilities that overwrite unallocated sectors. Understanding how storage drives communicate with operating systems allows you to diagnose the root problem methodically and rescue your records safely.
Whether your drive shows up as a RAW filesystem, appears unallocated in Disk Management, or fails to appear in your system device tree, proven recovery pathways exist. This detailed technical guide explains how to approach external hard drive not recognized data recovery, walks through essential triage steps, details software file carving workflows, and reviews the top recovery utilities and cleanroom services available.
- Never Agree to Format: If Windows displays “You need to format the disk in drive before you can use it,” always click Cancel. Formatting wipes partition headers and damages file index tables.
- Check Disk Management First: An external drive that does not show up in File Explorer might still be visible inside Windows Disk Management (`diskmgmt.msc`) or macOS Disk Utility.
- Avoid Running CHKDSK on Failing Drives: The `chkdsk` utility is designed for file system consistency, not data preservation. Running it on unstable drives with bad sectors often permanently destroys fragmented files.
- The RAW Filesystem Explained: When an external drive turns to RAW, the physical sectors are usually intact, but the file system index (NTFS MFT or exFAT FAT) is corrupted. Specialized software can carve files directly from the raw sectors.
- Stop Power to Clicking Drives: If your hard drive makes rhythmic clicking, scraping, or buzzing sounds, disconnect it immediately. Mechanical head failures cause severe platter gouging that leads to permanent data loss.
Diagnosing Detection Failures: Where Did Your Drive Disappear?
Before running any recovery utility, you must locate exactly where the communication breakdown occurs. Operating systems recognize storage devices through multiple architectural layers: the physical USB bus, the BIOS/UEFI firmware, the operating system kernel driver, and the logical file system manager.
Level 1: Drive Appears in Disk Management but Not in File Explorer
This is the most common and manageable scenario. Your drive does not appear under “This PC,” but when you open Windows Disk Management (`diskmgmt.msc`), you see the physical drive listed. It typically displays one of three conditions:
- RAW File System: The partition shows a drive letter, but the file system is labeled as “RAW” instead of NTFS, FAT32, or exFAT. The operating system cannot read the damaged partition boot sector.
- Unallocated Space: The entire drive capacity appears as a black bar labeled “Unallocated.” The Master Boot Record (MBR) or GUID Partition Table (GPT) has been damaged or erased.
- No Drive Letter Assigned: The partition is healthy and formatted with NTFS or exFAT, but Windows simply failed to assign a drive letter (such as `E:` or `F:`), making it invisible in File Explorer.
Level 2: Drive Appears in Device Manager but Not in Disk Management
If Disk Management does not list your storage drive, open Windows Device Manager (`devmgmt.msc`) and expand the “Disk drives” and “Universal Serial Bus controllers” categories. If your drive appears under its manufacturer name or as “USB Mass Storage Device” with a yellow warning triangle, the computer recognizes the physical connection, but a driver error, firmware handshake failure, or USB controller conflict prevents partition mounting.
Level 3: Drive Powers On but Fails to Appear in Device Manager or BIOS
When you connect the drive, you feel the internal platters spin smoothly and the activity LED illuminates, but the computer shows no sign of detection. The drive does not appear in Device Manager, Disk Management, or your computer’s BIOS/UEFI setup. This usually indicates a blown bridge controller board inside the external enclosure, a damaged USB port, or corrupted firmware on the drive’s Service Area tracks.
Level 4: Drive Produces Abnormal Clicking, Beeping, or Grinding Sounds
If you connect the drive and hear rhythmic clicking (known as the “Click of Death”), repetitive high-pitch beeping, or scraping noises, the drive has suffered mechanical failure. The read/write heads are either stuck on the magnetic platter surface, bent, or unable to read servo tracks. For these hardware failures, software cannot help. Disconnect the drive immediately to prevent destroying the magnetic platter coating.
External 2.5-inch portable hard drives rely entirely on the 5V power supplied by your computer’s USB port. Front-panel desktop USB ports and unpowered USB hubs often deliver insufficient amperage, causing drives to spin down or fail detection. Always connect external hard drives directly to the high-power USB ports on the back of your computer’s motherboard.
Understanding the RAW Drive Phenomenon
One of the most frequent reasons for data recovery hard drive not detected inquiries is a drive suddenly showing up as “RAW.” Understanding what happens beneath the surface eliminates panic and prevents costly mistakes.
What Does a RAW File System Mean?
A storage drive is simply a collection of billions of microscopic magnetic sectors. To store files, the operating system establishes a file system structure (such as NTFS on Windows, APFS on Mac, or exFAT for cross-platform use). This structure includes a Volume Boot Record (VBR), partition tables, and master index tables (such as the Master File Table in NTFS).
When you safely eject a drive, the operating system flushes cache buffers and closes index pointers cleanly. If an external drive is abruptly yanked from the USB port, suffers a power surge, or encounters bad sectors across index tracks, the Master File Table becomes corrupted. When Windows next mounts the drive, it cannot recognize the file system signature. Lacking a readable structure, Windows labels the partition as “RAW.”
How RAW Drive Data Recovery Works
Crucially, a RAW drive status does not mean your files are gone. In over ninety percent of RAW drive cases, your actual documents, photos, and videos remain completely intact across the storage platters. Only the index directory at the beginning of the partition has been scrambled.
Dedicated raw drive data recovery utilities bypass the damaged operating system drivers. Instead of relying on the corrupted file index, the software reads raw physical sectors sequentially. By identifying unique binary file headers and footers (known as file signatures), recovery algorithms reconstruct original files, file names, and directory trees directly into computer memory.
Hardware Triage: Physical Fixes Before Running Software
Before assuming your drive has suffered fatal partition corruption, rule out physical connectivity problems with these essential hardware checks.
1. Replace the USB Connection Cable
The standard USB 3.0 Micro-B cable supplied with most portable external hard drives is notoriously fragile. The tiny internal copper pins frequently bend, fatigue, or lose tension after repeated plugging. A degraded cable might supply enough 5V power to illuminate the drive’s LED while failing to establish the high-speed data transmission lines. Swap the cable with a known-working replacement to verify connectivity.
2. Connect Directly to Rear Motherboard Ports
Connecting portable hard drives through keyboard pass-through ports, monitor hubs, or unpowered multi-port dongles frequently causes under-voltage drops. The drive’s internal spindle motor struggles to reach its rated 5,400 RPM, causing the drive to disconnect repeatedly. Plug the drive directly into a blue or red USB 3.1/3.2 port on your computer’s rear I/O panel.
3. Test on an Alternate Computer or Operating System
Operating system driver caches can become corrupted. Plug the unrecognized external hard drive into a completely different computer running macOS, Linux, or a different Windows build. Linux distributions (such as Ubuntu Live USB) are exceptionally forgiving with minor partition table errors and can frequently mount drives that Windows rejects.
4. Enclosure Shucking (For Standard SATA Drives)
Inside most desktop external hard drives (such as Western Digital Elements Desktop or Seagate Expansion Desktop), you will find a standard 3.5-inch SATA hard drive connected to a small USB-to-SATA bridge adapter card. In many detection failure cases, the drive itself is completely healthy, but the bridge adapter board has failed due to thermal stress or voltage spikes.
Carefully opening the plastic enclosure (a process known as “shucking”) allows you to remove the internal SATA drive. You can then connect the bare drive directly to an internal desktop motherboard SATA port or insert it into a standalone USB docking station. Note: Many modern 2.5-inch portable Western Digital drives feature native USB ports soldered directly to the drive PCB, making shucking impossible without micro-soldering SATA conversion boards.
Software and Driver Troubleshooting Without Data Loss
If physical connections are confirmed operational and the drive spins smoothly, software configurations inside Windows can often restore drive accessibility.
Assigning a Missing Drive Letter
Sometimes Windows recognizes an external partition as healthy but fails to assign an available drive letter. To resolve this:
- Press Windows Key + X and select Disk Management.
- Locate your external hard drive in the lower volume panel.
- Right-click the healthy partition and select Change Drive Letter and Paths.
- Click Add, select an unused letter (such as `E:`, `G:`, or `M:`), and click OK.
- Open File Explorer to confirm that your drive and files now appear normally.
Reinstalling Corrupted USB Mass Storage Drivers
Outdated or corrupted Windows USB drivers can cause detection loops. To refresh your system drivers:
- Press Windows Key + X and choose Device Manager.
- Expand Universal Serial Bus controllers.
- Right-click USB Mass Storage Device and select Uninstall device.
- Expand Disk drives, right-click your external drive name, and select Uninstall device.
- Unplug the USB cable from your computer.
- Restart your PC. Once Windows boots back to the desktop, plug the drive into a rear USB port. Windows will automatically reinstall clean, updated controller drivers.
The Extreme Danger of Running CHKDSK on Damaged Drives
Many online forums advise running `chkdsk /f` in the Command Prompt to fix undetected or RAW drives. Data recovery engineers strongly advise against this. The Check Disk utility was designed in the MS-DOS era to ensure file system consistency for the operating system, not to preserve user data.
When CHKDSK encounters bad sectors or corrupted directory pointers, it aggressively strips invalid indexes, truncates orphaned file clusters, and overwrites sector allocation tables. If the drive has underlying physical degradation, the intense reading and writing stress of CHKDSK frequently causes catastrophic head crashes, turning a recoverable logical error into an unrecoverable hardware disaster.
The Professional Recovery Protocol for Undetected and RAW Drives
When hardware checks fail to make the partition readable normally, you must execute a structured hard drive not detected data recovery workflow using professional software utilities.
Phase 1: Sector-by-Sector Disk Imaging
The golden rule of professional data recovery is to never scan a failing or unstable drive directly. Running deep sector scans across a physically weak drive places hours of continuous thermal and mechanical stress on the heads. If the drive develops bad sectors during the scan, it can fail permanently mid-process.
Instead, use advanced recovery utilities (like R-Studio, DMDE, or ddrescue) to generate a byte-for-byte disk clone or compressed raw image file (`.img` or `.dd`) stored on a healthy, secondary hard drive. Once the image is created, disconnect the unstable external drive, store it safely, and run all file carving scans on the virtual clone.
Phase 2: Deep Signature Scanning (File Carving)
Launch a reputable recovery utility and select the target disk. Rather than scanning the corrupted logical drive letter, instruct the software to scan the physical device entity (e.g., `PhysicalDrive1` or `/dev/sdb`).
The recovery engine performs two passes simultaneously: it parses surviving fragments of the Master File Table to reconstruct original directory hierarchies, and it executes raw signature carving across unallocated sectors to identify file headers for over a thousand distinct formats (including JPEG, RAW camera images, DOCX, XLSX, PDF, and MP4 video containers).
Phase 3: File Preview and Integrity Verification
Once the scan completes, browse the reconstructed file tree. High-quality recovery programs feature built-in file viewers. Always open and preview high-resolution images, video clips, and document spreadsheets before purchasing a software license. A generated preview guarantees that the file’s binary structure is intact and not corrupted by zero-byte sector fills.
Phase 4: Exporting to a Healthy Secondary Drive
Select your desired folders and click “Recover.” Always specify an export destination folder on your computer’s internal storage drive or a second, healthy external backup drive. Never attempt to save recovered files back onto the undetected or RAW drive you are recovering from, as writing new data permanently destroys remaining unallocated sectors.
When Physical Failure Strikes: Cleanroom Laboratory Recovery
When an external hard drive suffers physical motor failure, electronic damage, or head crashes, software tools cannot establish communication. Attempting to power on a clicking or seized drive will grind the microscopic magnetic coating off the platters, destroying data forever.
Mechanical Triage in ISO Class 5 Cleanrooms
Hard drive platters rotate at speeds up to 120 times per second, with heads floating on a cushion of air thinner than a human hair or smoke particle. Opening a drive in normal room air exposes the platters to millions of microscopic airborne dust motes that cause immediate head crashes.
Professional recovery facilities operate certified ISO Class 5 cleanrooms with laminar air flow that filters out 99.97% of airborne particles down to 0.3 microns. Under high-powered stereo microscopes, cleanroom engineers perform delicate mechanical surgery:
- Head Stack Assembly Replacement: If the read/write heads are bent or dead, engineers source an identical donor drive with matching model, firmware, and pre-amplifier revisions. They use precision head combs to extract the donor head stack and transplant it into the patient drive without touching platter surfaces.
- Spindle Motor Seizure Resolution: If a drop bent the spindle motor shaft, engineers transfer the platter stack into a donor chassis using specialized platter alignment clamps that preserve delicate track alignment.
- Firmware Service Area Repair: Hard drives store proprietary operational firmware on hidden tracks at the outer edge of platters (the Service Area). Engineers use specialized hardware consoles (such as ACE Laboratory PC-3000) to patch corrupted firmware modules, disable degraded heads, and stabilize read operations.
Top 8 Solutions for Undetected & RAW Hard Drive Data Recovery
To assist you in choosing the most effective recovery utility or hardware service, we have evaluated eight leading solutions spanning consumer software, advanced disk editors, and cleanroom facilities.
1. EaseUS Data Recovery Wizard
EaseUS Data Recovery Wizard is an approachable, beginner-friendly desktop recovery program designed to rescue files from undetected, unformatted, and RAW storage drives. It has served millions of consumer users worldwide for over fifteen years.
EaseUS excels at identifying drives that have lost their volume letters or converted to RAW format. Its automated scanning engine pairs quick MFT indexing with deep signature carving, locating lost photos, office documents, audio recordings, and video files across internal and external hard drives.
The program features an intuitive visual interface with file category tabs and high-resolution preview windows, allowing users to verify file integrity before proceeding.
- Deployment Type: Desktop Software (Windows & macOS)
- Supported File Systems: NTFS, exFAT, FAT32, ReFS, APFS, HFS+
- RAW Drive Handling: Automatic sector carving for drives with corrupted partition tables
- Free Tier: Free scan and up to 2GB of data recovery with software sharing
- Best Use Case: Everyday computer users looking for a straightforward, guided recovery tool for RAW or unrecognized external drives
2. Disk Drill Data Recovery
Developed by CleverFiles, Disk Drill Data Recovery is a modern, high-performance recovery platform known for its polished user experience, versatile file carving engine, and robust disk health utilities.
Disk Drill provides comprehensive support for unrecognized and RAW external drives. It allows users to create byte-to-byte disk image backups (`.dmg` or `.iso`) directly within the application, protecting unstable drives from mechanical wear during recovery scans. Its deep scan algorithm parses hundreds of proprietary file signatures, successfully recovering raw camera files, compressed archives, and high-bitrate video footage.
The software includes preventative monitoring tools like S.M.A.R.T. disk health tracking and Recovery Vault protection.
- Platform: Windows and macOS
- Key Capabilities: Byte-to-byte disk imaging, RAW drive partition reconstruction, deep file carving
- Preview Feature: Full built-in file viewer supporting images, documents, and multimedia
- Free Allowance: 500MB of free file recovery on Windows
- Best Use Case: Users seeking a modern, visually intuitive utility with integrated byte-level disk imaging tools
3. R-Studio Data Recovery
R-Studio by R-Tools Technology is an advanced, enterprise-grade data recovery suite engineered specifically for IT administrators, forensic specialists, and seasoned recovery technicians.
R-Studio provides unmatched control over unrecognized, RAW, and heavily corrupted storage devices. It features advanced multi-pass disk imaging capabilities, allowing technicians to image fragile drives with bad sectors by skipping failing zones and reading reverse sector passes. It handles damaged MBR and GPT partition schemes, complex RAID arrays, and nested virtual disk containers effortlessly.
While its interface is technical and dense, its raw sector parsing algorithms deliver recovery results where consumer tools frequently fail.
- Deployment: Professional Desktop Software (Windows, macOS, Linux)
- Capabilities: Advanced multi-pass disk cloning, virtual RAID reconstruction, hex editor
- Supported Systems: Comprehensive support for NTFS, ReFS, FAT, exFAT, Ext2/3/4, HFS+, APFS, UFS
- Trial Model: Free trial allows scanning, file previewing, and recovery of small files
- Best Use Case: Advanced users, IT professionals, and technicians dealing with heavily corrupted or unstable external hard drives
4. Stellar Data Recovery Professional
Stellar Data Recovery Professional is a dependable, comprehensive storage utility developed by Stellar, a pioneer in digital data care and forensics since 1993.
Stellar Professional is particularly strong at recovering data from missing, raw, or unallocated partitions. Its “Can’t Find Drive” module specifically targets external hard drives that fail to display valid volume letters in File Explorer. The software interrogates physical disk sectors to locate historical partition geometries and restore lost file hierarchies.
The suite also includes specialized file repair utilities that can reconstruct corrupted JPEG photographs and MP4 video containers that suffered sector fragmentation.
- Supported OS: Windows 11/10 and macOS
- Core Specialty: Unallocated partition recovery and integrated video/photo repair tools
- Drive Health: Built-in Drive Monitor tool for real-time S.M.A.R.T. health and temperature tracking
- Free Allowance: Free scan and up to 1GB of free data recovery
- Best Use Case: Users needing to recover files from unallocated partitions alongside tools to repair corrupted video files
5. TestDisk & PhotoRec
Developed by Christophe Grenier, TestDisk and PhotoRec are legendary open-source, command-line utilities recognized worldwide for their power, transparency, and complete lack of commercial fees.
TestDisk focuses on repairing corrupted partition tables and rebuilding damaged boot sectors. If an external hard drive became unrecognized because its MBR, GPT, or NTFS boot sector was scrambled, TestDisk can rewrite the correct partition headers in seconds, making the drive bootable and readable again without moving files. Its companion program, PhotoRec, is a dedicated signature carver that ignores the file system entirely, extracting deleted or raw files directly from disk blocks.
Both tools are completely free, open-source, and portable, running directly from a USB flash drive.
- Deployment: Free Open-Source Command-Line Utility (Windows, macOS, Linux)
- Cost: 100% Free (GPL v2+ License, no file limits)
- Unique Feature: In-place partition table restoration and boot sector repair
- Interface: Text-based terminal interface (requires careful keyboard navigation)
- Best Use Case: Budget-conscious or technical users looking to repair damaged partition tables directly without paying for commercial software
6. Recuva
Recuva, developed by Piriform (the makers of CCleaner), is an approachable and lightweight data recovery tool designed for rapid file retrieval on Windows systems.
Recuva offers both a beginner-friendly setup wizard and an Advanced Mode with deep technical controls. While Recuva is primarily known for recovering accidentally deleted files from working drives, its “Deep Scan” feature can interrogate RAW or unformatted external drives to locate missing photos, music files, and documents.
Recuva has a tiny installation footprint and runs smoothly even on older or resource-constrained Windows PCs.
- Platform: Windows only
- Core Benefit: Extremely lightweight and fast resource footprint
- Interface: Simple wizard-driven interface with clear traffic-light file condition icons
- Pricing: Generous free version with unlimited recovery; paid Pro version adds virtual hard drive support
- Best Use Case: Windows users seeking a lightweight, free utility to search for common file types on recently unrecognized drives
7. DMDE (DM Disk Editor)
DMDE (DM Disk Editor and Data Recovery Software) is a powerful, highly specialized disk manipulation and file recovery suite developed for power users, disk engineers, and forensic experts.
DMDE includes a comprehensive hex editor, raw partition manager, and advanced signature recovery engine. It excels at finding lost partitions that operating systems consider completely gone. DMDE allows users to reconstruct directory structures in memory, inspect partition boot sectors manually, and perform in-place partition table repairs with surgical precision.
Its free version provides remarkable functionality, allowing users to browse and recover files within individual directories without time limits.
- Deployment: Portable Desktop Application (Windows, Linux, macOS, DOS)
- Specialty: Hex disk editing, partition table reconstruction, raw MFT carving
- Resource Use: Ultra-compact executable (under 5MB) requiring zero installation
- Pricing: Functional free edition; very affordable commercial licenses
- Best Use Case: Power users and technicians seeking surgical hex editing and partition reconstruction tools at minimal cost
8. DriveSavers Cleanroom Lab
When an external hard drive clicks, grinds, beeps, smokes, or fails to spin, software utilities cannot communicate with the hardware. DriveSavers is the global gold standard for cleanroom physical data recovery.
Operating certified ISO Class 5 cleanrooms, DriveSavers employs world-class mechanical and micro-soldering engineers. Their specialists perform complex head assembly transplants, unstick seized spindle motors, repair burned PCB electronics, and resolve firmware Service Area corruptions using specialized hardware consoles.
DriveSavers maintains official authorization from all major storage manufacturers (including Western Digital, Seagate, Toshiba, and Samsung), ensuring that laboratory evaluations do not void your original manufacturer warranties. They operate under a strict “No Data, No Recovery Fee” guarantee.
- Service Type: Certified Cleanroom Physical Data Recovery Facility
- Capabilities: Micro-soldering, cleanroom head transplants, spindle motor unseizing, firmware repair
- Manufacturer Authorization: Authorized by Western Digital, Seagate, Toshiba, and Samsung
- Policy: Strict No Data, No Recovery Fee policy with transparent upfront pricing
- Best Use Case: External hard drives with physical damage, mechanical clicking, burned electronics, or total motor failure
Comparison of Undetected & RAW Hard Drive Solutions
The table below summarizes deployment formats, RAW drive capabilities, undetected drive support, and primary strengths across all eight reviewed solutions.
| Solution | Deployment Type | RAW Drive Support | Undetected Drive Handling | Pricing / Tier | Best Use Case |
|---|---|---|---|---|---|
| EaseUS Data Recovery | Desktop Software | Yes (Automated Carving) | Yes (If visible in Disk Mgmt) | 2GB Free Allowance | Everyday consumer recovery from RAW or unallocated external drives |
| Disk Drill | Desktop Software | Yes (Deep Scan Engine) | Yes (Includes disk imaging) | 500MB Free (Windows) | Creating byte-to-byte disk clones and deep-scanning RAW partitions |
| R-Studio | Professional Desktop | Yes (Advanced Parser) | Yes (Multi-pass imaging) | Free Preview Scan | Complex recovery on unstable drives with bad sectors and corrupted RAID |
| Stellar Professional | Desktop Software | Yes (Partition Search) | Yes (Can’t Find Drive mode) | 1GB Free Allowance | Locating lost partitions and repairing corrupted video or photo containers |
| TestDisk & PhotoRec | Command-Line Tool | Yes (Partition Repair) | Yes (Rewrites MBR/GPT) | 100% Free / Open-Source | Repairing partition tables in-place without moving files across drives |
| Recuva | Desktop Software | Yes (Deep Scan Mode) | Partial (Needs drive letter) | Free Unlimited Recovery | Lightweight file retrieval on older or low-resource Windows PCs |
| DMDE | Portable Disk Utility | Yes (Hex & MFT Editor) | Yes (Direct physical access) | Generous Free Version | Surgical hex editing and partition reconstruction for power users |
| DriveSavers Lab | Cleanroom Hardware Lab | Yes (All Hardware Damage) | Yes (Cleanroom Surgery) | No Data, No Fee | Clicking, buzzing, burned, dropped, or mechanically dead external hard drives |
Step-by-Step Tutorial: How to Recover Data from an Unrecognized Drive Safely
Follow this standardized, six-step protocol to rescue your files from an unrecognized or RAW external hard drive without causing irreversible sector damage:
- Halt Usage and Check for Physical Symptoms: Connect the drive and listen closely. If the drive makes repetitive clicking, beeping, or scraping noises, disconnect it immediately. If the drive hums smoothly, proceed to software triage.
- Inspect Windows Disk Management: Press Windows Key + X and select Disk Management. Check whether your drive appears as a physical disk (e.g., Disk 1 or Disk 2). Note whether the partition shows as RAW, Unallocated, or healthy without a drive letter.
- Test Power and Ports: Disconnect any unpowered USB hubs or keyboard pass-throughs. Plug the drive directly into a high-powered rear USB 3.0 port using a known-working replacement cable.
- Create a Disk Image Backup: If the drive is unstable or displays bad sectors, open a utility like Disk Drill or R-Studio and create a byte-for-byte disk clone (`.img` file) to a healthy secondary drive. Perform all subsequent file carving on this clone.
- Execute a Deep Signature Scan: Launch your preferred recovery program (such as EaseUS Data Recovery or Stellar Professional). Select the physical drive entity and run a deep signature scan. Allow the scan to complete fully to locate fragmented files.
- Preview and Export Recovered Records: Browse the scan results and open file previews to verify file integrity. Select your critical folders and export them to your internal computer drive or a separate backup disk. Never export files onto the unrecognized external drive.
- Always Use “Safely Remove Hardware”: Never pull a USB cable out while the drive LED is flashing. Ejecting flushes write caches and prevents RAW partition corruption.
- Monitor S.M.A.R.T. Health Attributes: Run free utilities like CrystalDiskInfo periodically to check for reallocated sectors and pending sector counts.
- Avoid Moving Active Hard Drives: Mechanical hard drive platters spin thousands of times per minute. Moving or bumping a drive while active can cause the heads to slap the platter surface.
- Store Portable Drives in Padded Cases: Protect fragile USB Micro-B ports and internal suspension springs against impact shocks during travel.
- Implement the 3-2-1 Backup Strategy: Keep three copies of critical records on two different media types, with at least one copy stored off-site or in the cloud.
Frequently Asked Questions
Why does my computer say “You need to format the disk” when I plug in my external hard drive?
Windows displays this prompt when it detects a storage partition but cannot read its file system index. This happens when an external drive is unplugged during a write operation, suffers a sudden power interruption, or develops bad sectors across the Master File Table. Windows assumes the partition is blank and offers to format it. Always click Cancel. Formatting overwrites sector tables and makes subsequent file recovery significantly more difficult.
Can I recover files from an external hard drive that doesn’t show up in Disk Management at all?
If an external hard drive does not appear in Windows Disk Management, consumer recovery software cannot access it. The computer cannot establish an electrical or firmware handshake with the drive controller. First, swap the USB cable, connect directly to rear motherboard ports, or test on another computer. If the drive spins but remains undetected, the internal USB bridge adapter may have failed. If the drive is clicking or completely silent, a cleanroom laboratory must repair the hardware before data can be extracted.
Is it safe to run CHKDSK on an unrecognized or RAW external hard drive?
No, running CHKDSK on a RAW or unstable hard drive is dangerous. CHKDSK is designed to force file system consistency for the operating system, not to recover user files. When CHKDSK encounters unreadable sectors or corrupted file pointers, it strips orphaned metadata, reallocates directory indexes, and truncates file fragments. Running CHKDSK on a physically failing drive frequently causes permanent data destruction. Always recover your files with specialized software before attempting any file system repairs.
What is the difference between a logical drive failure and a physical hard drive failure?
A logical failure occurs when the physical hard drive hardware (motor, platters, circuit board, read/write heads) is completely healthy, but the software data structures (partition tables, file system metadata, boot records) are corrupted, deleted, or labeled as RAW. Logical failures can almost always be solved using recovery software. A physical failure involves hardware breakdowns: broken heads, burned PCB components, seized motors, or platter scratches. Physical failures cannot be fixed with software and require cleanroom laboratory repairs.
Can I remove the hard drive from its plastic enclosure to make it work?
Yes, for many desktop and older portable external hard drives, removing the drive from its enclosure (known as shucking) is an effective diagnostic technique. External enclosures contain a separate USB-to-SATA bridge board that can burn out while the internal SATA drive remains fully functional. By removing the bare drive and connecting it directly to a computer’s internal SATA port or a standalone USB dock, you bypass the dead bridge board. However, many modern 2.5-inch portable Western Digital drives feature native USB ports soldered directly onto the drive PCB, preventing standard SATA connections.
Conclusion: Restoring Your Undetected External Drive Files Safely
Facing an unrecognized or RAW external hard drive is intimidating, but disciplined troubleshooting prevents permanent data loss. Never click “Format disk,” avoid destructive utilities like CHKDSK on unstable storage, and verify whether simple cable or port issues are masquerading as major failures. Leverage byte-level disk imaging, utilize dedicated file carving suites for logical partition damage, and partner with certified cleanroom laboratories when mechanical clicking strikes to safely rescue your invaluable digital records.